Tips from the experts can transform your flooring project into a seamless experience. Whether you’re a DIY enthusiast or new to home improvement, understanding key installation techniques will empower you to achieve impressive results. In this blog post, you’ll discover practical advice and insights that will guide you through every step of the flooring installation process, helping you make informed choices for your space. Let’s examine the expertise of Flooring Giant and simplify your journey to beautiful, durable flooring.
Understanding Different Flooring Types
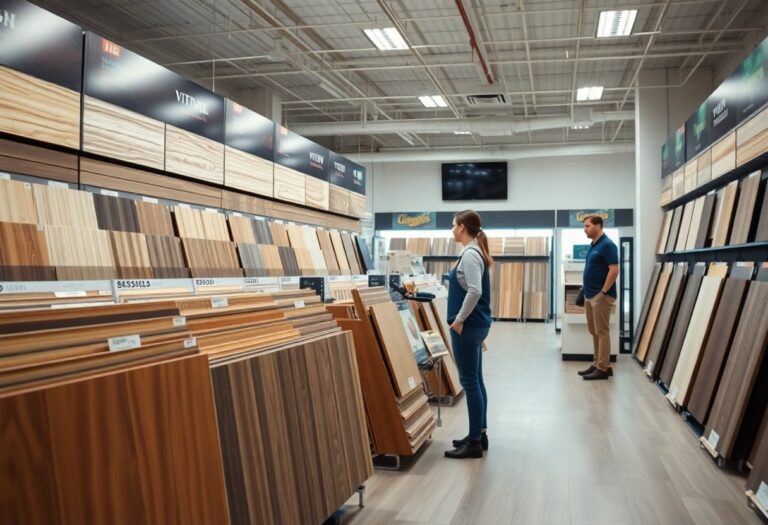
For those seeking to transform their spaces, understanding various flooring types is important. Each option offers unique benefits that may suit your style and function. Consider the following:
- Durability
- Maintenance requirements
- Comfort level
- Cost
- Installation methods
Thou can select the best flooring type based on these factors.
| Flooring Type | Description |
| Hardwood | Natural wood, timeless and elegant |
| Laminate | Affordable and versatile, mimicking wood |
| Vinyl | Water-resistant and easy to clean |
| Carpet | Soft and warm, ideal for comfort |
Hardwood Flooring
Different hardwood flooring options provide a blend of beauty and durability, making them an appealing choice for many homes. With a variety of finishes and wood types, hardwood flooring can enhance your interior aesthetics while adding value to your property.
Laminate Flooring
Along with being cost-effective, laminate flooring is a popular choice due to its versatility and ease of installation. It comes in many styles, allowing you to achieve your desired look without breaking the bank.
Flooring technology has advanced significantly, and today’s laminate options are more resilient and realistic than ever. You can find laminate that closely replicates the appearance of hardwood or stone, providing you with flexibility in design.
Vinyl Flooring
Hardwood may offer a classic look, but vinyl flooring provides a modern, practical alternative. Waterproof and stain-resistant, vinyl is perfect for high-traffic areas or homes with children and pets.
Laminate flooring offers an impressive range of designs, making it a versatile option for any room. Its durability means it can handle daily wear and tear, providing you with a beautiful and functional flooring solution.
Carpet Flooring
Flooring options like carpet offer unparalleled comfort and warmth, making it ideal for bedrooms and cozy spaces. The soft texture adds a welcoming feel to your home.
Flooring experts suggest that opting for carpet can provide not only comfort but also warmth during colder months. You can select from various styles, colors, and patterns, tailoring your choice perfectly to match your home décor. This choice ensures that your flooring reflects both your style and functional needs.
Tools and Materials Needed for Installation
The right tools and materials can simplify your flooring installation process significantly. By preparing a checklist of necessary items, you ensure a smooth workflow and a professional finish. Make sure you gather everything before you start, so you can focus on bringing your flooring vision to life without interruptions.
Essential Tools
Against common belief, you don’t need a vast array of tools for flooring installation. Instead, focus on the crucials like a measuring tape, utility knife, miter saw, and a flooring nailer or stapler depending on your chosen material. Having these at hand will make your job quicker and more efficient.
Recommended Materials
Behind every successful flooring project lies quality materials. Selecting the right type of flooring—whether it’s hardwood, laminate, or vinyl—matters significantly. Your choice should reflect your aesthetic, lifestyle needs, and budget.
Installation can greatly benefit from choosing high-quality underlayment and adhesives, enhancing durability and comfort in your space. Additionally, ensure you have ample planks or tiles to account for cuts and mistakes. Investing in reliable materials not only elevates the appearance of your flooring but also contributes to its longevity and ease of maintenance.

Preparing Your Space for Installation
Your flooring installation journey begins with proper space preparation. Clear the room of furniture and any obstructions to create a clean and empty work area. Ensure that all surfaces are dust-free, and consider removing old flooring if necessary. This step will help facilitate a smooth installation process and give you the best results for your new flooring.
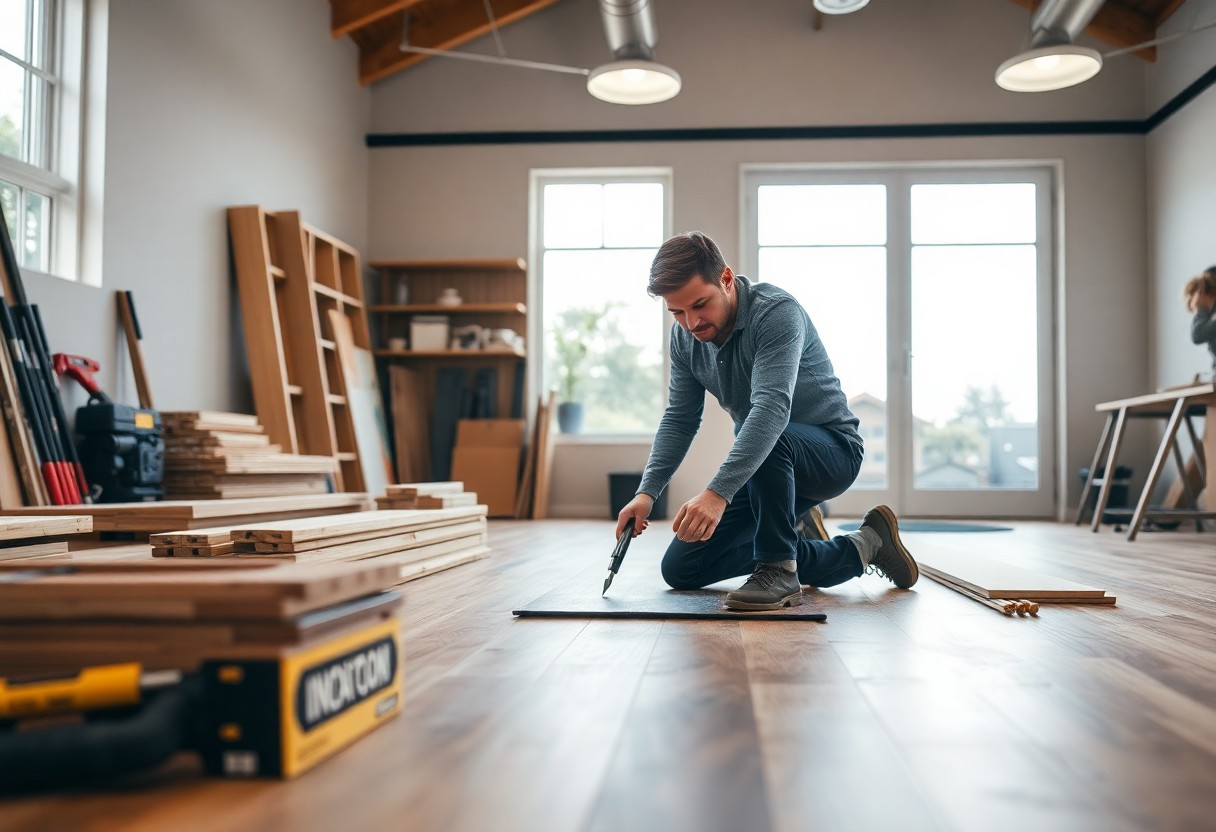
Measuring the Area
Preparing to install your new flooring starts with accurate measurements of the space. Use a tape measure to determine the length and width of the room. This will help you calculate the total square footage, ensuring you order the right amount of flooring material without waste.
Preparing the Subfloor
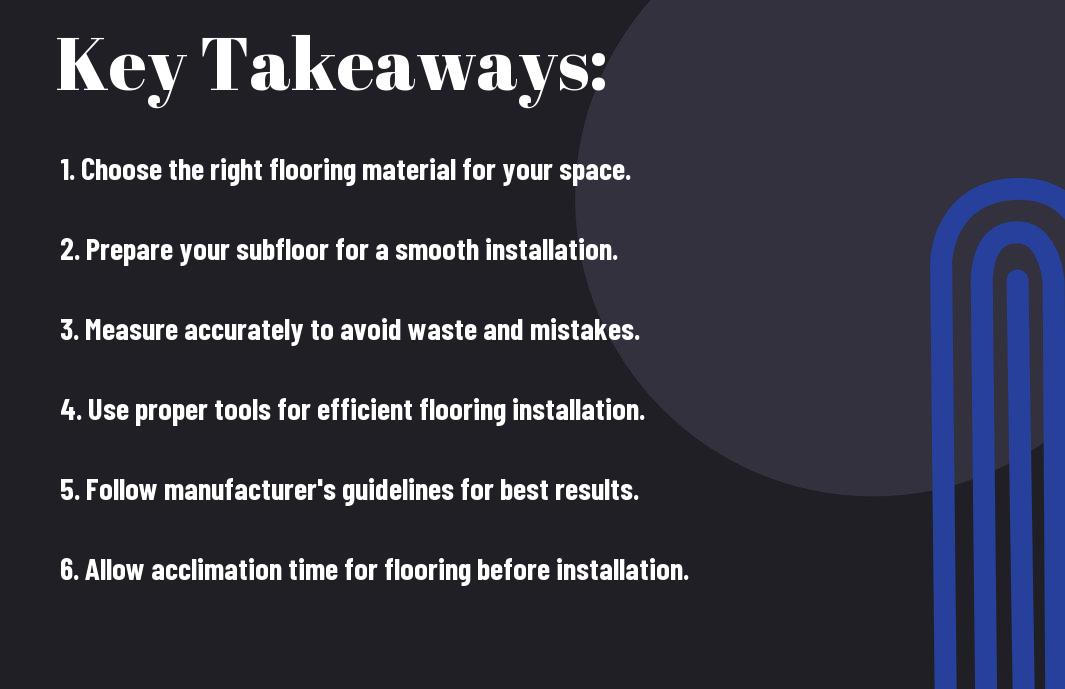
Between choosing the right flooring and installation, it’s important to check the condition of your subfloor. Make sure it is clean, dry, and level to provide a solid foundation for your new flooring.
Installation of your new flooring will be significantly smoother if the subfloor is properly prepared. Look for any signs of damage or moisture, and repair as needed. Remove any existing floor coverings like carpet or tiles, and patch up any holes or inconsistencies. Ensuring your subfloor is smooth and level will help enhance the longevity and appearance of your new installation.
Step-by-Step Installation Guide
After you decide on the flooring type, follow this step-by-step guide to ensure a successful installation. Planning is key, so take your time to prepare the area and gather the necessary tools. Use the table below to outline the key steps you should take during the installation process.
| Step | Description |
|---|---|
| 1. Measure | Accurately measure the area to determine how much flooring you need. |
| 2. Prepare | Ensure the subfloor is clean, dry, and level for proper installation. |
| 3. Acclimate | Let your flooring acclimate to the room temperature for optimal performance. |
| 4. Install | Follow specific techniques for your chosen flooring type during installation. |
| 5. Finish | Add any necessary trim or finishing touches to complete your project. |
Installation Techniques for Various Flooring Types
Techniques for installing different flooring types vary, and being aware of these differences can save you time and effort. For hardwood, nails or glue are often used, while laminate typically employs a click-lock system. Vinyl planks can be fully glued down or floated. It’s necessary to choose the right method to achieve the best results. The following table outlines the specific techniques for common flooring materials:
| Flooring Type | Installation Technique |
|---|---|
| Hardwood | Nail or glue down |
| Laminated | Click-lock system |
| Vinyl | Glue down or floating |
| Tile | Thin-set mortar |
| Carpet | Stretch-in or glue down |
- Always check the manufacturer’s guidelines before starting.
- Keep your work area clean to avoid accidents.
- Use appropriate underlayment for your flooring type.
- Don’t rush through the acclimation process.
- Assume that each step is just as important as the last.
Common Mistakes to Avoid
Installation errors can lead to significant issues down the road, so it’s vital that you pay attention to details. Ensure you don’t skip foundational steps like subfloor preparation, which can compromise your entire project. Also, avoid over-tightening your flooring, as this can lead to warping or buckling. The key is to always follow best practices throughout the process to achieve a professional finish.
The most frequent mistakes often stem from insufficient preparation. Failing to acclimate materials, ignoring the manufacturer’s guidelines, or not preparing the subfloor properly can result in long-term damage. Take time to measure and check your tools, as accuracy is necessary in obtaining optimal results. A little patience and attention to detail will help you bypass these pitfalls and enjoy beautiful flooring for years to come.
Maintenance Tips for Longevity
Many homeowners overlook the importance of proper flooring maintenance. To ensure the longevity of your flooring, consider these tips:
- Regularly sweep or vacuum to remove debris
- Use mats at entryways to reduce dirt and moisture
- Wipe up spills immediately to prevent stains
- Conduct periodic deep cleanings based on flooring material
- Refinish hardwood floors every few years to maintain their shine
Perceiving maintenance as a routine part of your home care will greatly extend the life of your flooring.
Cleaning and Care
On a daily basis, you should focus on light cleaning to prevent dirt buildup. Use a soft-bristled broom or vacuum cleaner designed for your specific flooring type. Additionally, employing a damp mop with a suitable cleaner will help keep your floors looking pristine. Always follow manufacturer guidelines for the best results.
Repairing Damages
For minor scratches or dents, quick fixes can restore your flooring’s appearance easily. You can use wood filler for hardwood damage or adhesive products for vinyl and laminate. Regularly assess your floors for wear and take action promptly to mitigate further issues.
This proactive approach not only enhances the aesthetic but also increases the lifespan of your flooring. If you encounter significant damage, professional help may be necessary. By knowing when to seek assistance, you can avoid permanent issues and ensure your floors remain in top condition for years to come.
Hiring a Professional vs. DIY Installation
Now, you may be wondering whether to hire a professional or tackle flooring installation yourself. While DIY can be cost-effective, it requires time, skill, and proper tools. If you possess the expertise and confidence, you can achieve a beautiful result on your own. However, if you’re unsure or lack experience, hiring a professional ensures a flawless finish and saves you potential headaches. Professionals also offer warranties and can complete the job more efficiently, allowing you to enjoy your new flooring sooner. Weigh the pros and cons based on your comfort level and project scope before deciding.
To wrap up
To wrap up, flooring installation can be a straightforward process when you incorporate expert tips from Flooring Giant into your approach. By choosing the right materials and tools, preparing your subfloor properly, and following systematic installation techniques, you can achieve stunning results in your space. Whether you’re a novice or an experienced DIYer, these strategies will empower you to create a beautiful floor that reflects your personal style while ensuring durability and functionality in your home.